Minibikes have been around for hundreds of years. Just like go-karts and dune buggies, the first minibikes were more often than not ones that people would just make out of parts that they could find in their garage. A DIY mini bike could be made out of anything you might find in a garage-like an engine out of a lawnmower, sheet metal laying around, scarp tubes that have already been welded together, and more.
The more prominent that mini bikes became, the more kits to make them were made and put out in stores. These kits that came out made a much more sophisticated type of minibike than the homemade ones that were the early designs. However, there is a lot that goes into rebuilding these minibikes to create a running, complete machine. If you do not mind learning your parts and all of the pieces that go into it, you can get a nice bike built in no time. Below is a guide to rebuilding a mini bike and ending up with a product you can enjoy for a long time to come.
Get out all of the tools you need
To build your mini bike, you first want to get out all of the tools that you are going to need and set them out neatly so that you can access them quickly when the time comes. You will need pliers, socket wrenches, at least one ratchet, wrenches of different sizes, a hammer, and screwdrivers of different sizes with both flat and Phillips heads.
TAKE IT ONE STEP AT A TIME
Rebuilding a mini bike is going to be very detailed-oriented work and it takes a lot of work, which can make it an intimidating project to do. For this reason, it is important to start with something easy, which means your first logical step will be to install the seat.
MOVE ON TO THE ENGINE
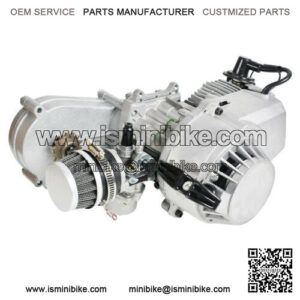
The next step is to move onto the one thing that ruins the whole bike, the engine. A mini bike can be powered by nearly any type of small engine, from a tractor engine to an engine created specifically for a mini bike such as Briggs & Stratton engine, Tecumseh engine, or a Clinton engine. These engines are automatic and will become more engaged as the rpm increases when you ride.
REMOVE AND REPLACE ANY DAMAGED COMPONENTS
Once you have your engine put in and the seat installed, then you need to look at your other mechanical components. You will inspect the threaded inserts, look at the fasteners, and the machine screws, and inspect anything that is rotting or becoming damaged. If anything is damaged, it will be important to take those mechanical or non-mechanical parts off of the bike and replace them with completely new pieces so that the bike is built correctly, is sturdy, and durable ready to last for many years. This will give you a chance to work on your loosening and tightening skills and will help keep you refreshed on all the important parts.
KEEP ALL OF YOUR SMALL PARTS TOGETHER
Your mini bike is going to have a lot of small parts and each small component comes with small screws and nuts to hold the component on. When you see a component that needs to be repaired or replaced and you remove the component, it is very important to keep all of the small parts that are a part of the component together, so you know what small parts go with what and nothing gets lost once the component comes off.
TAKE OFF THE GASKETS
When you are restoring your minibike or building it up, it is very important to check on your gaskets. Your gaskets may look completely fine and as though there is nothing wrong with them. However, it is a good practice to go ahead and remove and replace your gaskets. A lot of mini bikes come with the wrong size gaskets anyway, which means you need to check them as it is. Even if the gaskets are the right size and are in good shape, it is important to have extra gaskets on hand, as they will need to be replaced at some point and it never hurts to have a spare when the time comes.
Some of the components of the bike are going to be very complex and difficult to rebuild and put back on the bike the right way, when this happens it is important to assemble the component, disassemble it, and put it back together again. This will make sure that you are not surprised in any part of it, and everything is put together cleanly. If you take your time and put all the parts on one step at a time, you will get your minibike rebuilt in no time, and you will be riding for many years to come.
About minibike engine
“mini bike engine”
“mini bike engine kit”
“mini bike engine with clutch”

