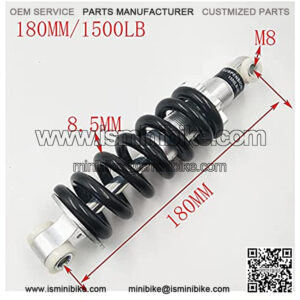
Rear Suspension Adjustments
Rear spring preload
We’ll start at the rear, where there’s generally more control over a dirt bike’s stock suspension.
First, measure rider sag. Put your bike on a center stand and, using a tape measure, measure a straight line from somewhere on your rear fender or mud guard to the center of the axle nut. Then don all your riding gear (even a helmet), take the bike off the stand, and stand on the pegs. Bounce a few times to work out any stiction, then have a helper measure that same distance again. Subtract small from big and viola, you have your rider sag figure. Look for a number between 95mm and 115mm, or about 33% of the rear end’s total possible travel.
Change sag by loosening the lock ring and adjusting the spring preload ring using a hammer and punch.
-
Turning clockwise increases preload, and vice versa
-
More preload results in less sag, and vice versa
-
Each full turn changes sag by about 3mm
Repeat the process of measuring, sitting, and measuring until you reach the desired sag. The owner’s manual, a shop, a friend, or the forums can help you determine the optimal sag settings for your needs.
Next, measure free sag by measuring that same line when the bike is sitting by itself, off the stand. Look for a number between 25mm and 45mm to confirm that you have the correct spring rate. A figure near or below 25mm means you need a harder spring; near or above 45mm says you need a softer one, for optimal performance.
Needing a different spring is common if your body weight falls at either end of what may be considered average. You will also need a new spring if the shock’s preload must be dialed to either extreme to reach the correct sag, or if it’s dialed out and the sag still isn’t right. And given enough time, springs just wear out. Companies like Racetech make aftermarket front and rear springs of various rates.
It’s worth mentioning they make tools for measuring sag, like the one pictured above. Having one isn’t necessary but it will make life easier down the road.
Rear damping
Adjustment points are going to vary based on your bike. Öhlins makes it easy as you can see, and if your bike doesn’t have points like those your hardware may not be adjustable.
As far as numbers go, check the web for recommended settings for your bike. Those figures will make a good baseline to work from. The goal is to retain enough compression to avoid bottoming out and enough rebound to maintain traction while avoiding a bouncy ride.
Low speed compression: Adjusted with a nut at the top of the reservoir, often clicks when turned.
High speed compression: Either incorporated into the low speed nut or a separate nut near that area.
Rebound: Adjusted at the bottom of the shock, often using a wheel or a flathead screwdriver.
About Rear Suspension
“rear suspension”
“rear suspension toe link”
“rear suspension parts”
“rear suspension bike”
“rear suspension kit”

