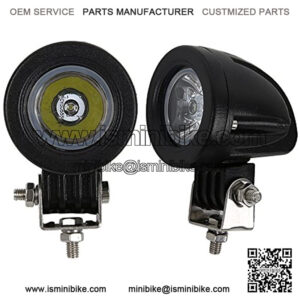
FIRST OFF DON’T WASTE YOUR TIME WITH REGULATORS AND RECTIFIERS. I’VE BEEN THERE AND DONE THAT, AND YOU WILL NOT LIKE THE LIGHT OUTPUT AS WELL AS THE HUGE DECREASE IN LIGHT FROM IDLE TO FULL THROTTLE. THIS TUTORIAL WILL GIVE YOU LOTS OF LIGHT AND SAVE YOU TIME IN MONEY AND PARTS !!

So here is what you need to do…
1. Go buy a good fog light from your local auto parts store. We chose a 5 1/4 round fog light so it matches the bike (brand name Pilot PL-2202C) that has a nice shallow base and is easy to mount. Plus it comes with 2 lights so you have a spare or another light to do another bike. While your there pick up a 100 watt H3 bulb for this pilot system. If your selection already has a 100 watt build then your good to go, make sure it’s a 100 watt bulb !! The main idea here is to buy a light that has an H3 bulb so that you can upgrade the bulb to a 100 watt bulb. This is a must in order to be able to handle the varying AC current that comes from the stator.
WARNING !!! THIS WILL NOT WORK WITH A 55 WATT BULB !!!!
1. Ensure that your pit bike has a lighting coil. The easiest way to figure this out is to look at the wiring harness coming out of the left hand side of your motor case. If you have 5 or more wires then your good to go. If you only have 3 wires then there is no lighting coil on your stator and you will have to buy one off of eBay. Don’t get discouraged though, they are only about $25 shipped and very easy to replace.
2. Buy a handlebar light switch. I bought mine from my local cycle gear store for $20. Works great and is just a simple 2 wire switch. This switch is important and has to be installed !! If you hard wire your headlight with no switch and attempt to start the bike with the headlight on every time you will still risk blowing the 100 watt bulb as well as wear out your stator because there is such a huge spike of AC current when you kick start the bike. MAKE SURE THE LIGHT IS IN THE OFF POSITION EVERY TIME YOU START THE BIKE !
3. Locate the yellow and white wires up in the wiring harness on your bike. You will need to remove the seat, fairings, and gas tank to do all of this work and give you all the space you need for a clean install running wires etc. the yellow and white wires may be tucked up in the harness inside the black sleeving so you may need to cut the black sleeving open in order to gain access to them. Once you have found the wires then your ready to install the headlight.
4. Run 2 wires directly from the headlight. Give yourself enough wire slack to work with so connect about a 3 foot lead of wire. So the next part is easy and I’m going to break this down in simple terms for everyone that isn’t an electrician or understand wiring. Think of these 2 wires as the positive and negative on your battery in your car. If you connected one of the wire to the negative, and one to the positive, then your headlight will light up. If you want to try this out then pop the hood on your car and try it. It will get you excited to see how bright your headlight is going to be. So lets detail the 2 wires now.
***The positive side of the wire is always going to be the wire that connects to the H3 bulb (it is the white heat shielded wire with a flat male connector)***
***The negative wire will be the wire that connects to the H3 bulb housing***
Once you have those 2 connected. Mount the headlight to the front of the bike so that way you know you have enough slack in your wiring as you do your install. Make sure you keep moving your handlebars on the bike from side to side so you can see that the wires aren’t to tight stopping you from turning the bars.
5. Install the headlight switch on the handlebars. Pick a side you want it on, it really doesn’t matter. Now I suggest using this switch as a ground, thus eliminating the risk of a positive current from grounding out on the bars. So what your going to do is run the negative wire from the headlight up to this switch and connect to the darker colored wire coming from the switch. Then the other wire coming from the switch you will need to run another wire to and ground directly to the frame of the bike. So this is how your switch works just so you have an understanding:
Your negative wire from the headlight now runs through the switch and then grounded to the bike. Every time you flick the switch off it is like cutting that wire in half so the circuit is no longer there and the headlight had no ground, thus the light won’t work.
Make sense ? I just like to make sure you understand what it is your actually doing when you do it, it helps during the install of the whole process.
6. Connect the positive wire to the yellow wire on the wiring harness. Now I have 5 pit bikes and have done this on all of the bikes. The yellow and white wire are connected to the lighting coil on the stator, which means that you can connect to either one of the wires, but I chose to connect to the yellow every time, and then cap the white wire to make sure it’s protected and doesn’t touch any other wires or the frame on the bike. Now you don’t have to, but I chose to install a fuse in this wiring and put a 20 amp fuse in it to protect the light. This will ensure the fuse blows before the light bulb protecting your investment.
NOW THIS WORKED ON ALL SSR AND MOST PIT BIKES… BUT NOT ON MY ROKETA !
On the ROKETA pit bike the stator lighting coil is not grounded so you have to do this instead. Connect the white wire to the positive wire coming from the headlight and then take the yellow wire and ground to the frame of the bike. This will complete the lighting coil circuit and will work. (Other bikes may have this same issue but I don’t know what all bikes may have this wiring issue as well so if the first way doesn’t work then try this method).
Now zip tie up all your wires for a clean install, and use shrink wrap or electrical tape to protect all your connection points from moisture. Reinstall your gas tank, fairings and seat.
Start the bike and enjoy a headlight that is as bright as a car headlight.
YOU NOW GET YO ENJOY SOME BAD A** NIGHT RIDING !!
About mini bike headlight
“mini bike headlight wiring”
“mini bike headlight kit”
“mini bike headlight battery”
“mini bike headlight bulb”
“mini bike headlight battery operated”

